Last Updated on October 23, 2025 by David
Ultimate Guide to Understanding Grout Haze and Its Impact on Your Tiles
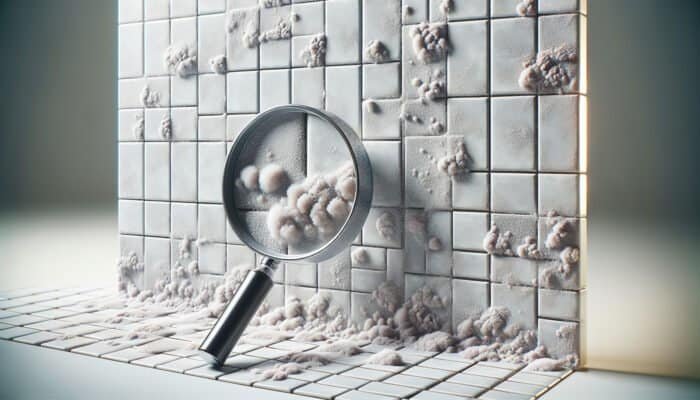
Defining Grout Haze: Uncovering the Unpleasant Residue on Your Tiles
Grout haze is an irritating and unsightly filmy residue that often remains on tiles after the grouting process is complete. This bothersome residue usually occurs when excess grout is not adequately wiped off the tile surface during installation. The presence of this unattractive haze can severely diminish the overall visual appeal of your tiled spaces, giving them a dull and neglected appearance, even if the tiles themselves are of premium quality. This haze typically presents as a white or cloudy film, which can harden over time if not addressed, complicating its removal. Keeping your tiles clean is crucial not only for aesthetic purposes but also for ensuring their long-term durability and resilience against wear and tear.
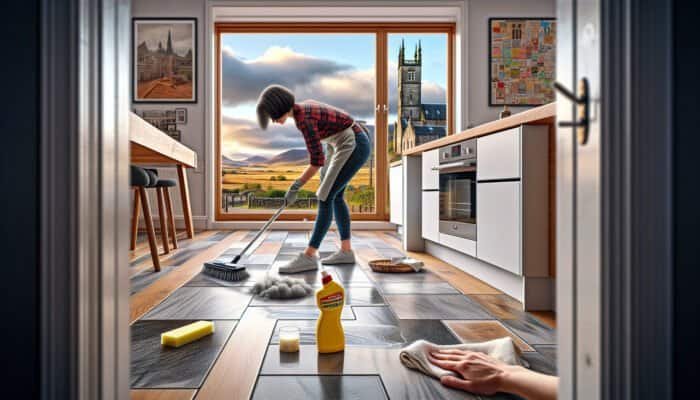
Expert Recommendations: Top Products for Daily Tile Maintenance
The presence of grout haze not only detracts from the visual aesthetics of your tiles but can also negatively impact their structural integrity and longevity. When grout haze accumulates, it tends to trap dirt and grime, making cleaning increasingly difficult over time. This is especially critical in moisture-rich environments, such as bathrooms or kitchens located in West Dunbartonshire, where timely removal of grout haze is essential for preserving both the beauty and functionality of your tiles. Taking proactive measures can prevent long-term damage and ensure the durability and integrity of your tiled surfaces.
Identifying the Primary Causes of Grout Haze Formation
Understanding the primary causes of grout haze is crucial for implementing effective prevention strategies. The primary contributor to haze formation is often inadequate cleaning of grout during the installation phase. If grout is allowed to dry on the tile surface, it hardens into a tough, inflexible layer that becomes exceedingly challenging to remove. Inadequate wiping techniques, the use of inappropriate tools, or ineffective cleaning solutions can compound this issue. Awareness of these factors is essential for both homeowners and tilers to prevent future occurrences.
Additionally, the specific type of grout utilized can influence the propensity for haze development. Certain grouts, particularly those with a higher cement content, are more prone to leaving a residue. Insufficient dilution of cleaning solutions or water can also contribute to persistent haze, as concentrated grout residue becomes increasingly difficult to dissolve and eliminate. Understanding these causes empowers both homeowners and tilers to adopt preventive measures during installation, ensuring that tiles maintain their intended shine while avoiding future complications.
The Importance of Timely Grout Haze Removal for Tile Longevity
Removing grout haze is not merely a cosmetic concern; it is vital for the longevity and performance of your tiled surfaces. Allowing grout haze to persist can lead to various issues, including attracting dirt and increasing the risk of mould growth, especially in damp areas such as bathrooms. Tiles that are free from haze not only appear more attractive but also provide a smoother surface that is easier to clean and maintain, contributing to a hygienic living environment.
Moreover, neglecting grout haze can lead to permanent discolouration over time. Dirt and grime may become trapped within the haze, resulting in unsightly stains that could require professional intervention to resolve. Addressing grout haze promptly ensures that your tiles remain in pristine condition, thereby enhancing the overall value of your home. In regions such as West Dunbartonshire, where the climate can promote moisture retention, prioritizing the removal of grout haze is crucial for preserving both the beauty and functionality of your tiled areas.
Essential Preparatory Steps for Effective Grout Haze Removal

Implementing Safety Measures Before You Start Cleaning
Prioritizing safety is paramount before initiating the process of removing grout haze from tiles in West Dunbartonshire. Many cleaning products designed to eliminate grout haze contain harsh chemicals that may pose potential health risks. Therefore, wearing gloves is an essential precaution to safeguard your skin from irritation or chemical burns. Additionally, using protective eyewear will shield your eyes from any splashes, allowing you to work confidently without the worry of accidental contact with harmful substances.
It is advisable to work in a well-ventilated area, particularly when utilizing commercial cleaners. Adequate ventilation helps reduce the risk of inhaling harmful fumes. If you are sensitive to strong odours or chemicals, consider wearing a respirator mask for added protection. By taking these precautions, you can ensure a safe cleaning experience while effectively addressing the challenge of grout haze, thereby protecting both your health and your home.
Gathering Essential Supplies for Grout Haze Removal
Having the right tools on hand is crucial for a successful grout haze removal process. Start by gathering essential supplies, including sponges, buckets, and your preferred grout haze remover. Natural solutions like vinegar or baking soda can be effective against less stubborn haze, while commercial cleaners may be necessary for tougher cases that require a more aggressive solution.
A stiff-bristled brush is an indispensable tool, particularly for scrubbing grout lines where haze tends to gather. Clean water is also essential for rinsing tiles after applying your cleaning solution. Having a microfiber cloth available will assist in the final drying process, ensuring that no residue is left behind. By assembling all necessary supplies beforehand, you can streamline the cleaning process and avoid interruptions while effectively tackling the haze.
Assessing the Condition of Your Tiles Prior to Cleaning

Before beginning the cleaning process, it is wise to evaluate the condition of your tiles. This assessment helps determine the best approach for removing grout haze. Inspect for visible damage, such as cracks or chips, as these can affect how you proceed with the cleaning. If your tiles have undergone previous cleaning attempts, note areas that may have been unintentionally scratched or discoloured, as this can impact your choice of cleaning method.
Understanding the type of tile you are working with is also critical. Different materials exhibit varying levels of durability and porosity, which can influence the cleaning method you decide to use. For instance, natural stone tiles might require gentler cleaning solutions compared to ceramic or porcelain tiles. By carefully assessing the condition of your tiles, you can tailor your approach to ensure effective and safe removal of the haze without causing additional damage or complications.
The Importance of Testing Your Grout Haze Remover
Conducting a test is an essential step before applying any grout haze remover across your entire surface. Select a discreet area of your tiles, ideally in a corner or behind a piece of furniture, and apply a small amount of the cleaning solution. Observe the area for any adverse reactions, such as discolouration or damage, which might indicate that the product is unsuitable for your tiles. Allow the solution to sit for the recommended duration according to the product instructions before wiping it away to evaluate its effectiveness.
If the test area shows no negative effects, you can proceed with confidence. However, if you notice any discolouration or damage, it would be wise to reconsider your choice of cleaner. Opting for a gentler formula or a DIY solution may be necessary, especially if you are working with delicate tiles. This precautionary step can help you avoid costly mistakes and ensure that your tiles remain in pristine condition throughout the cleaning process, thereby protecting your investment.
Organizing Your Work Area for Efficient Cleaning
Creating an optimal environment for successful grout haze removal involves meticulously preparing your work area. Begin by removing any furniture or items that might obstruct your access to the tiled surfaces. This not only improves your ability to clean effectively but also protects your belongings from accidental splashes or spills during the cleaning process, which can be damaging.
Consider covering nearby surfaces with drop cloths or old sheets to shield them from accidental drips and protect them from harm. This precaution is especially important in kitchens and bathrooms, where surfaces can easily become soiled with cleaning solutions. Taking the time to thoughtfully prepare your work area will facilitate a smoother cleaning experience, ultimately leading to more effective results in removing grout haze from tiles in West Dunbartonshire and ensuring that your tiles shine brilliantly once the haze is gone.
Proven DIY Techniques for Effective Grout Haze Removal
Using a Vinegar Solution for Efficient Grout Haze Removal
One of the most accessible and eco-friendly methods for removing grout haze from tiles in West Dunbartonshire is by utilizing a vinegar solution. To create this effective cleaner, mix equal parts of water and white vinegar in a spray bottle or bucket. This natural solution is renowned for its capability to dissolve minerals and dislodge dirt without harming most tile surfaces, making it a popular choice among homeowners.
When applying the vinegar solution, generously cover the hazy areas and let it sit for a few minutes to effectively break down the residue. After this dwell time, use a sponge or cloth to gently scrub the tiles, focusing on areas with significant haze. The acidity of the vinegar helps lift the haze while imparting a fresh scent. After scrubbing, rinse the tiles thoroughly with clean water to remove any lingering vinegar residue, ensuring a sparkling finish that highlights the beauty of your tiled surfaces.
For particularly stubborn grout haze, you may consider using a stronger vinegar solution by reducing the amount of water. Nonetheless, always exercise caution and perform a small test area first to confirm that your tiles can withstand the increased acidity. Following up with a final rinse and dry will leave your tiles with a renewed appearance, free from the unsightly haze and ready for everyday use.
Creating a Baking Soda Paste: A Simple Yet Effective Cleaning Method
Another highly effective DIY method involves creating a baking soda paste. This eco-friendly solution combines baking soda with water to form a thick paste that serves as a gentle abrasive cleaner. To prepare the paste, mix approximately three parts baking soda with one part water until a spreadable consistency is achieved, making it ideal for tackling stubborn stains and haze.
Apply the paste directly to the grout haze, concentrating on areas that appear particularly cloudy or stained. Allow the paste to sit for at least 10 to 15 minutes, giving the baking soda time to penetrate and lift the haze. After the time has elapsed, use a soft sponge or toothbrush to scrub the area gently, ensuring that you do not scratch the tile surface. The mild abrasive nature of baking soda effectively helps to eliminate stubborn residue without causing damage.
Once you have thoroughly scrubbed the area, rinse with clean water to remove any residue left from the baking soda paste. This method not only addresses the haze but also revitalizes the grout itself, resulting in rejuvenated tiles. Regular use of this paste can also help prevent future haze buildup, making it a valuable addition to your cleaning routine and promoting long-lasting tile care.
When to Use Commercial Cleaners for Stubborn Grout Haze
For those struggling with particularly persistent grout haze, commercial cleaners specifically formulated for this purpose may be the most effective solution. Available at local hardware stores in West Dunbartonshire, these products contain powerful ingredients designed to dissolve grout residues efficiently. When selecting a commercial cleaner, ensure that you carefully read the label to confirm compatibility with your tile type, as some cleaners can be too harsh for delicate surfaces.
Before applying the cleaner to the entire surface, conduct a patch test on a less visible area as a precaution. Follow the manufacturer’s instructions for application, which typically involves spraying the solution onto the haze and allowing it to sit for a specified duration. After the recommended dwell time, scrub the area using a soft brush or sponge, focusing particularly on grout lines where haze tends to accumulate due to higher residue buildup.
While commercial cleaners can be highly effective, it is crucial to remember that some may contain harsh chemicals. Always prioritize safety by wearing gloves and using the cleaner in a well-ventilated space to avoid inhaling fumes. After scrubbing, thoroughly rinse the tiles with clean water, ensuring that no residue remains. With the right product and technique, you can restore your tiles to their original brilliance, enhancing the overall appearance of your home.
Benefits of Engaging Professional Cleaning Services in West Dunbartonshire
Exploring the Advantages of Professional Cleaning Services
Hiring professional services for removing grout haze from tiles in West Dunbartonshire offers numerous benefits that extend beyond mere convenience. Professionals bring expertise and specialized tools necessary to tackle even the most stubborn grout haze without risking damage to your tiles. Their extensive knowledge of various tile types and their specific cleaning requirements ensures a tailored approach to your situation, leading to optimal results.
Moreover, professionals often have access to industrial-strength cleaners and equipment that can achieve results unattainable through DIY methods. This efficiency can save you significant time and effort, allowing you to focus on other aspects of your home while the experts manage the cleaning effectively. Additionally, a professional service can provide valuable insights into proper tile care and maintenance, helping prolong the life of your tiled surfaces while preventing future issues.
Ultimately, opting for professional assistance can lead to a more thorough and effective cleaning process, minimizing the chances of haze reformation. For homeowners in West Dunbartonshire, investing in professional tile cleaning services can be a wise choice, ensuring that your tiles maintain their beauty and functionality for years to come, thereby enhancing the overall appeal of your home environment.
How to Find Reliable Local Tile Cleaning Experts?
When searching for reputable tile cleaning services in West Dunbartonshire, various strategies can simplify your search. Start by seeking recommendations from friends, family, or neighbours who have previously utilized local services. Their firsthand experiences can provide valuable insights into the quality and reliability of potential providers, enabling you to make an informed decision.
Online resources like review platforms and local business directories can also assist in identifying trusted professionals. Look for companies with strong ratings and positive feedback, especially those that specifically mention their expertise in grout haze removal. Additionally, many businesses showcase their work on social media platforms, allowing you to view before-and-after photographs that demonstrate their effectiveness and customer satisfaction.
Don’t hesitate to contact multiple service providers to inquire about their offerings, methods, and pricing. A reputable service will be transparent about their procedures and should be willing to provide references upon request. Taking the time to research local experts will ensure that you find a service that meets your needs and expectations, leading to a successful cleaning experience.
Understanding the Cost Factors for Professional Cleaning Services
The cost associated with professional services for removing grout haze from tiles in West Dunbartonshire can vary significantly based on several factors, including the size of the area to be cleaned, the severity of the haze, and the specific service provider. Typically, larger areas or more extensive haze issues may require more time and resources, thereby increasing the overall cost. Understanding these factors can assist you in budgeting effectively for the service.
On average, homeowners might expect to pay anywhere from £50 to £100 for professional tile cleaning services; however, this amount can fluctuate depending on the complexity of the job and the pricing structure of the provider. It is essential to obtain multiple quotes from various providers to assess what you can expect to pay. This not only offers you a clearer picture of the market rate but also provides an opportunity to compare the services offered and ensure you receive good value for your investment.
While it may be tempting to choose the lowest quote, it is crucial to weigh value against cost. Cheaper services may compromise on quality or use less effective methods, resulting in unsatisfactory outcomes. Prioritizing a balance between affordability and quality can ultimately save you money in the long run by ensuring that the job is performed correctly the first time, thereby protecting your tiles from unnecessary damage.
How to Schedule Your Professional Cleaning Appointment?
Once you have selected a reputable tile cleaning service, scheduling an appointment for removing grout haze from tiles in West Dunbartonshire becomes the next step. Many professionals offer flexible scheduling options, accommodating your availability to ensure minimal disruption to your daily activities. When booking, discuss any specific concerns you may have regarding the haze or your tiles so that the service provider can adjust their approach to effectively address your needs.
It is advisable to schedule the cleaning at a time when you can allow the area to remain clear post-cleaning. This ensures that the tiles have sufficient time to dry properly and that any residual cleaning products can dissipate without interference. Following the appointment, maintain communication with the service provider regarding any lingering issues or concerns, as many reputable services will offer follow-up support to ensure your satisfaction.
Timely scheduling of professional services is essential for maintaining the aesthetic and functional quality of your tiles. By ensuring that grout haze is promptly addressed, you can enjoy beautifully maintained tiled surfaces that enhance your home’s overall appearance and value.
Detailed Step-by-Step Guide for Effective Grout Haze Removal
Initiating the Cleaning Process with an Initial Clean
The journey to removing grout haze from tiles in West Dunbartonshire begins with an initial cleaning phase. This preliminary step is crucial for preparing the surfaces and enhancing the effectiveness of the subsequent removal process. Start by using a damp sponge to wipe down the tiles, concentrating on areas where grout haze is most pronounced. This initial wipe will help remove loose particles and minimize the amount of haze that will need to be tackled in later steps.
In addition to using a damp sponge, consider employing a soft cloth to dry the tiles after the initial wipe. This prevents additional moisture from settling on the surface, which could potentially lead to further haze formation. Thoroughness is key; the more effectively you can remove loose residue, the easier it will be to eliminate the haze itself and achieve a clean, bright finish.
As you clean, pay special attention to grout lines, where haze tends to accumulate. These areas may require a bit more scrubbing to ensure that you are starting with a clean slate. This initial cleaning phase sets the stage for a successful haze removal process, allowing you to tackle the challenge ahead with confidence and clarity.
Applying Your Chosen Cleaning Solution: The Best Method
After completing the initial cleaning, it’s time to apply your selected cleaning solution. Whether you choose a vinegar solution, baking soda paste, or a commercial cleaner, following the product’s instructions is crucial for effective cleaning. Begin by generously applying the solution over the areas affected by haze, ensuring that the tiles are well covered and saturated for optimal effectiveness.
For DIY solutions like vinegar or baking soda paste, be mindful of the dwell time specified in your preparation. Allow the solution to sit for the recommended period, as this will enable the active ingredients to penetrate the haze effectively. During this time, you may notice the solution working to lift the haze, which can be encouraging as you await the subsequent steps in the cleaning process.
After the dwell time, use a soft sponge or a brush with stiff bristles to scrub the tiles lightly. Focus on grout lines where haze tends to gather, ensuring that you apply enough pressure without risking damage to the tile surface. This scrubbing phase is crucial for breaking down and eliminating stubborn haze, preparing your tiles for the final rinse and drying to restore their original luster.
Conducting the Final Rinse and Drying Steps
After scrubbing, the next critical step in removing grout haze from tiles in West Dunbartonshire is the final rinse and drying process. Start by thoroughly rinsing the tiles with clean water to wash away any remnants of the cleaning solution. This step is essential to ensure that no residue is left behind, as leftover cleaner can contribute to further haze formation or attract dirt and grime over time.
Utilize a clean sponge or cloth to assist with the rinsing process, ensuring that all areas are adequately attended to and rinsed thoroughly. Pay special attention to grout lines, as these can harbour residue more easily and require extra care. Once you’ve rinsed the tiles, use a dry microfiber cloth to wipe the surface, promoting a polished finish and preventing water spots from forming on your tiles.
Allow the tiles to air dry fully after the initial drying process. This final drying phase is crucial for ensuring that no moisture remains trapped, which could lead to further complications such as mould growth or haze re-deposition. By completing this step thoroughly, you can enjoy the sight of your beautifully restored tiles, free from haze and perfectly clean, enhancing the overall ambiance of your living spaces.
Emphasizing Effective Scrubbing of the Grout Lines
One of the most critical aspects of removing grout haze from tiles in West Dunbartonshire is scrubbing the grout lines. Grout lines are often the most susceptible to haze accumulation, making it essential to give them extra attention during the cleaning process. Using a stiff-bristled brush, focus on scrubbing the grout lines with a targeted approach, ensuring that you reach every crevice and corner of the grout to eliminate all residue.
When scrubbing, it’s best to use a combination of your cleaning solution and a gentle scrubbing motion. This will help lift any lingering haze while also allowing you to tackle any dirt or stains that may have settled in the grout over time. Be cautious not to apply too much force, as this can risk damaging the grout or surrounding tiles, leading to additional repair needs.
After scrubbing, rinse the grout lines thoroughly with clean water to remove any debris or cleaning solution. This step is crucial for ensuring that the grout appears clean and fresh, enhancing the overall look of your tiled surfaces. If you notice any remaining discolouration, consider repeating the scrubbing process to achieve the best results and ensure a thorough cleaning.
Conducting a Final Inspection and Retouching as Needed
Once the tiles have dried, it’s time for the final inspection and retouching phase of your grout haze removal process. Carefully examine the tiles and grout lines for any lingering haze, stains, or discolouration. This inspection is vital for determining whether further cleaning is necessary or if the job is complete, ensuring that your tiles meet your expectations for cleanliness.
If you identify any stubborn areas that still show signs of haze, don’t hesitate to apply your cleaning solution once more, focusing specifically on those trouble spots. Repeat the scrubbing process as needed, followed by a thorough rinse to ensure they are clear of any cleaning residues. This attention to detail will guarantee that every area of your tiles is pristine and free from haze, contributing to a well-maintained home environment.
Retouching may also involve applying a sealant to the grout once it has fully dried. This preventative measure will help protect against future haze formation and staining, making maintenance easier in the long run. By taking the time to inspect and retouch as needed, you can ensure that your tiles remain in excellent condition, contributing to a polished and welcoming home atmosphere.
Preventative Steps to Avoid Future Grout Haze
Implementing Proper Grouting Techniques During Installation
Preventing future grout haze primarily revolves around implementing proper grouting techniques during the installation phase. One of the main contributors to haze formation is the application method; ensure that the grout is applied evenly and that excess material is promptly wiped away from the tile surface before it can set. Using the right tools, such as a grout float, can help achieve a smooth and even application, thereby reducing the likelihood of residue buildup.
Moreover, choosing high-quality grout products specifically designed to minimize haze can be an effective preventative measure. Many manufacturers offer grout formulations that are less prone to leaving a residue on tiles, thereby reducing future maintenance needs. By selecting these products, you can significantly diminish the chances of encountering haze in the future, maintaining the aesthetic appeal of your tiled surfaces.
Training and experience are critical for applying grout correctly. If you’re not confident in your ability to install grout without risking haze formation, consider hiring a professional. Their expertise will ensure that the job is completed correctly the first time, saving you time and potential headaches down the line while guaranteeing a flawless finish.
Incorporating Consistent Tile Maintenance into Your Regular Cleaning Routine
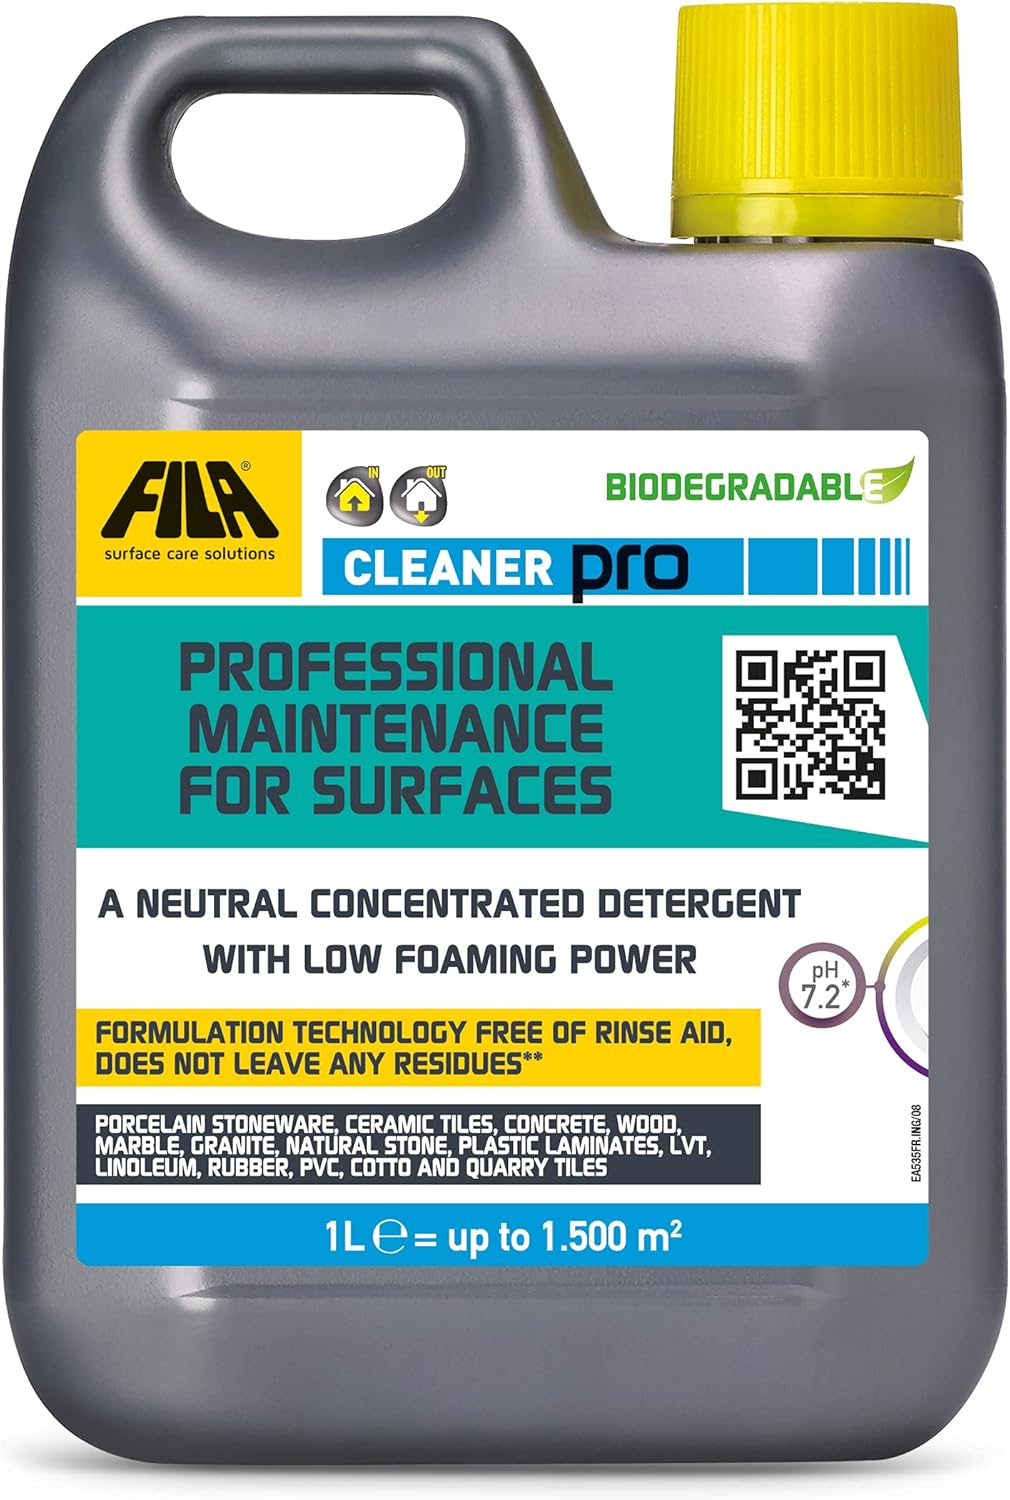
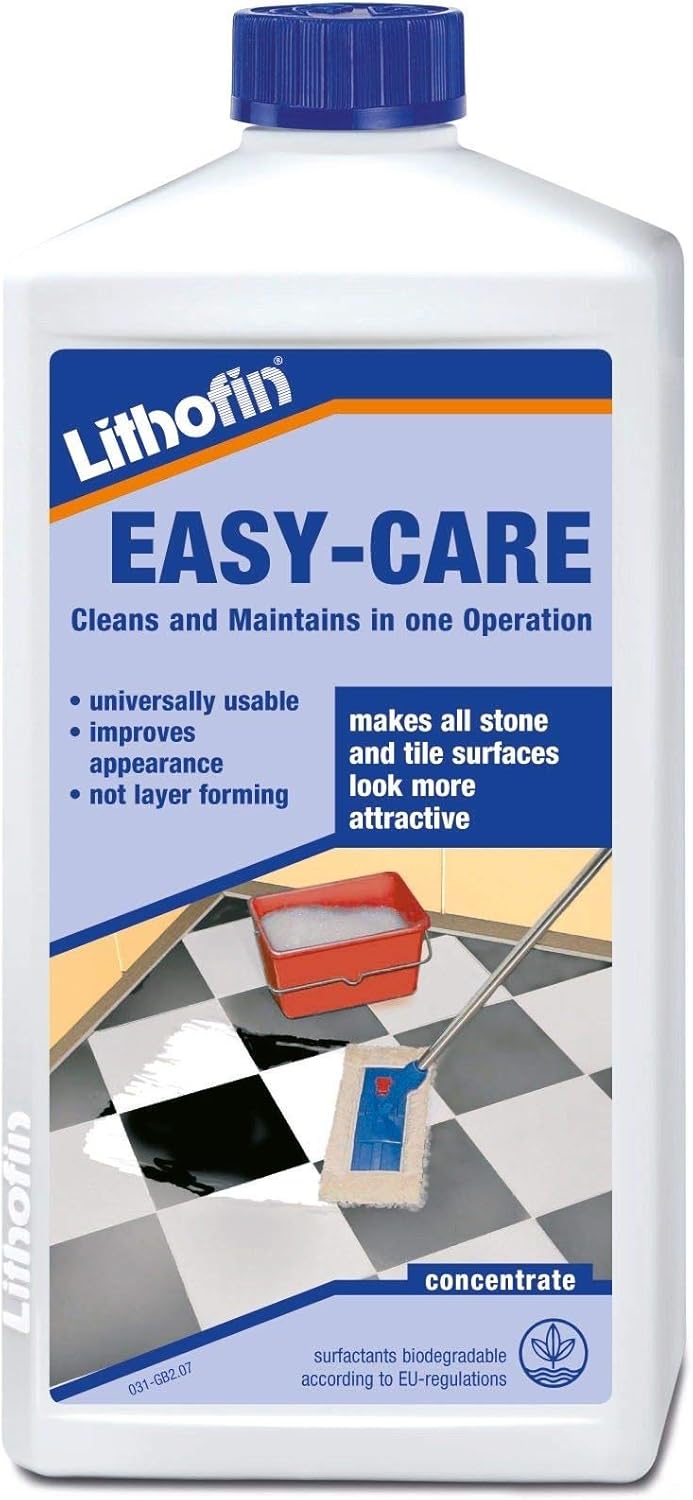
Integrating regular tile maintenance into your cleaning routine is vital for preventing the buildup of grout haze. Establishing a schedule for cleaning your tiled surfaces can help eliminate dirt and grime before they have a chance to settle and form haze. Utilize a gentle, pH-neutral cleaner specifically designed for your tile type, as harsher substances can lead to deterioration over time and compromise the integrity of your tiles.
In addition to general cleaning, pay special attention to grout lines and corners, where dirt tends to accumulate. Regularly using a soft brush to clean these areas will keep them looking fresh and help prevent the long-term effects of haze formation. Routine inspections of your tiles are also advisable, as this will allow you to catch any developing issues early on, ensuring that your tiles remain in optimal condition.
Another effective measure is to apply a sealant to your grout once it has fully cured. Sealants create a protective barrier that helps to prevent stains and haze from forming, keeping your tiles looking pristine. Regularly reapplying sealant every few years will ensure ongoing protection, safeguarding your tiled surfaces against future grime and haze accumulation.
Utilizing Sealants for Long-Term Protection Against Grout Haze
Applying tile sealants is one of the most effective strategies for preventing grout haze and maintaining the beauty of your tiles. Sealants create a protective layer over the grout, helping to repel moisture and prevent dirt from penetrating the surface. By sealing your grout, you effectively minimize the chances of haze formation that often arises from trapped moisture and grime, ensuring your tiles remain visually appealing.
Before applying a sealant, ensure that the grout is completely dry and clean to maximize its effectiveness. Most sealants require a specific application process, so it’s essential to follow the manufacturer’s instructions meticulously. Typically, you’ll apply the sealant with a small applicator or brush, ensuring even coverage across the grout lines for optimal protection.
Regular maintenance of the sealant is equally important. Depending on the type of sealant used and the foot traffic in the area, reapplication may be necessary every six months to a year. Staying on top of this maintenance will ensure that your tiles remain protected against future haze formation, keeping them looking their best and prolonging their lifespan.
Common Mistakes to Avoid in Grout Haze Removal
Preventing the Use of Abrasive Tools During Cleaning
One of the most common mistakes homeowners make when removing grout haze from tiles in West Dunbartonshire is using abrasive tools. While it may seem logical to reach for a rough scrubber or steel wool, these tools can cause irreversible damage to your tiles, scratching the surface and compromising their finish. Instead, opt for soft sponges or cloths that are gentle yet effective for cleaning, preserving the integrity of your tile surfaces.
It’s also crucial to select the right brush when tackling grout lines. A stiff-bristled brush can be effective, but ensure it’s designed specifically for tile and grout cleaning to avoid potential damage. Taking the time to choose the appropriate tools can save you from costly repairs and ensure that your tiles remain in excellent condition, enhancing the overall appearance of your home.
When in doubt, always err on the side of caution. If you’re unsure whether a cleaning tool is too abrasive, conduct a small test on an inconspicuous area to gauge its effects. Your tiles deserve the best care possible, so always prioritize gentle cleaning methods to achieve the desired results without risking damage.
Avoiding Overuse of Cleaning Chemicals
Another common pitfall in the cleaning process is the excessive use of chemicals. While it may be tempting to enhance cleaning power by using more product, this can often lead to diminishing returns—or worse. Overusing cleaning chemicals can damage the tile finish or grout, as well as provoke respiratory issues for those exposed to strong fumes and harsh substances.
It’s essential to adhere to the manufacturer’s guidelines regarding the amount of cleaner to use. Often, a smaller quantity of a concentrated cleaner is far more effective than applying large amounts. This approach not only protects your tiles but also promotes a healthier cleaning environment for you and your family.
If you find that a product isn’t working as effectively as desired, consider exploring alternative cleaning methods or products instead of simply increasing the dosage. Maintaining a balanced approach to chemical use will lead to better outcomes and preserve the integrity of your tiles, ensuring they remain in excellent condition.
Establishing a Regular Maintenance Routine: An Essential Practice
Failing to implement a regular maintenance routine can lead to significant challenges in tile upkeep. Neglecting your tiles may result in the accumulation of dirt and grime, which contributes to haze formation and makes subsequent cleaning more arduous. Establishing a consistent cleaning schedule will help prevent buildup and keep your tiles looking their best, ensuring a clean and hygienic living space.
Regular maintenance doesn’t have to be time-consuming. Simple tasks, such as wiping down tiles with a damp cloth or conducting a weekly sweep, can greatly assist in preventing haze. Additionally, consider incorporating a deep cleaning session every few months, during which you can focus on grout lines and address any stubborn stains or hazy areas that may have developed.
By prioritizing regular maintenance, you can preserve the beauty of your tiles and reduce the need for intensive cleaning. This proactive approach ensures that your tiled surfaces remain clean and inviting for years to come, enhancing the comfort and aesthetics of your home.
Choosing the Right Cleaning Solutions: What to Avoid?
Using the wrong type of cleaning solution can lead to discolouration and damage to your tiles. Many homeowners mistakenly believe that harsher products are more effective, but this approach can often backfire and necessitate costly repairs. It is crucial to select cleaning solutions that are specifically designed for your tile type and avoid any acidic or abrasive cleaners unless they are appropriate for your specific surface.
Before applying any cleaning solution, always check the manufacturer’s recommendations to ensure compatibility with your tiles. If you’re uncertain, opt for a gentle, pH-neutral cleaner that is suitable for a variety of surfaces. This approach will help you avoid potential damage and ensure that your tiles remain in pristine condition, ready to enhance your home’s beauty.
Conducting a small patch test before full application is always advisable. This precaution allows you to gauge any adverse reactions before committing to a larger area. By being diligent in your product choice, you can maintain the beauty and integrity of your tiled surfaces, avoiding unnecessary damage.
Frequently Asked Questions About Grout Haze Removal
What is grout haze and what causes it?
Grout haze is a filmy residue that forms on tiles after grouting, typically resulting from excess grout not being cleaned off during installation. It can significantly diminish the aesthetic appeal of your tiles.
How can I effectively eliminate grout haze from my tiles?
You can effectively remove grout haze using a vinegar solution, baking soda paste, or commercial cleaners specifically designed for grout haze removal. Each method has its own benefits depending on the severity of the haze.
Is it safe to utilize vinegar for grout haze removal?
Yes, vinegar is a safe and effective natural solution for removing grout haze. However, always conduct a patch test first to ensure it does not damage your tiles, particularly if they are made from sensitive materials.
Can I remove grout haze without professional assistance?
Absolutely! Numerous DIY methods can effectively remove grout haze, including the use of vinegar or baking soda. However, for extensive haze, consulting professionals may be beneficial for optimal results.
How frequently should I clean my tiles to prevent haze from forming?
Regular cleaning every 1-2 weeks, combined with occasional deep cleaning, can help prevent the accumulation of grime and future haze formation, ensuring your tiles remain in excellent condition.
What tools do I need for effective grout haze removal?
You’ll require sponges, buckets, a stiff-bristled brush, and a suitable grout haze remover, along with clean water for rinsing to ensure thorough cleaning and maintenance of your tiles.
Can grout haze cause damage to my tiles?
While grout haze itself typically doesn’t damage tiles, leaving it untreated can lead to dirt accumulation and potential discolouration over time, necessitating more intensive cleaning efforts.
How long does it typically take to remove grout haze?
The time required depends on the severity of the haze and the method used. Generally, it can take anywhere from 30 minutes to a few hours for complete removal, depending on your approach.
Is professional cleaning a worthwhile investment?
Yes, professional cleaning can save you time and ensure a thorough job, especially for extensive or stubborn grout haze issues that require specialised tools and knowledge to address effectively.
What preventative measures can I implement against grout haze?
Utilising proper grouting techniques, applying sealants, and maintaining a regular cleaning schedule can prevent future grout haze formation, ensuring your tiles remain beautiful and well-maintained.
The Article Removing Grout Haze from Tiles in West Dunbartonshire: A Local Guide first found on https://www.abbeyfloorcare.co.uk
The Article Removing Grout Haze: Your Local Guide for West Dunbartonshire appeared first on https://fabritec.org
The Article Grout Haze Removal: A Local Guide for West Dunbartonshire Was Found On https://limitsofstrategy.com


No responses yet